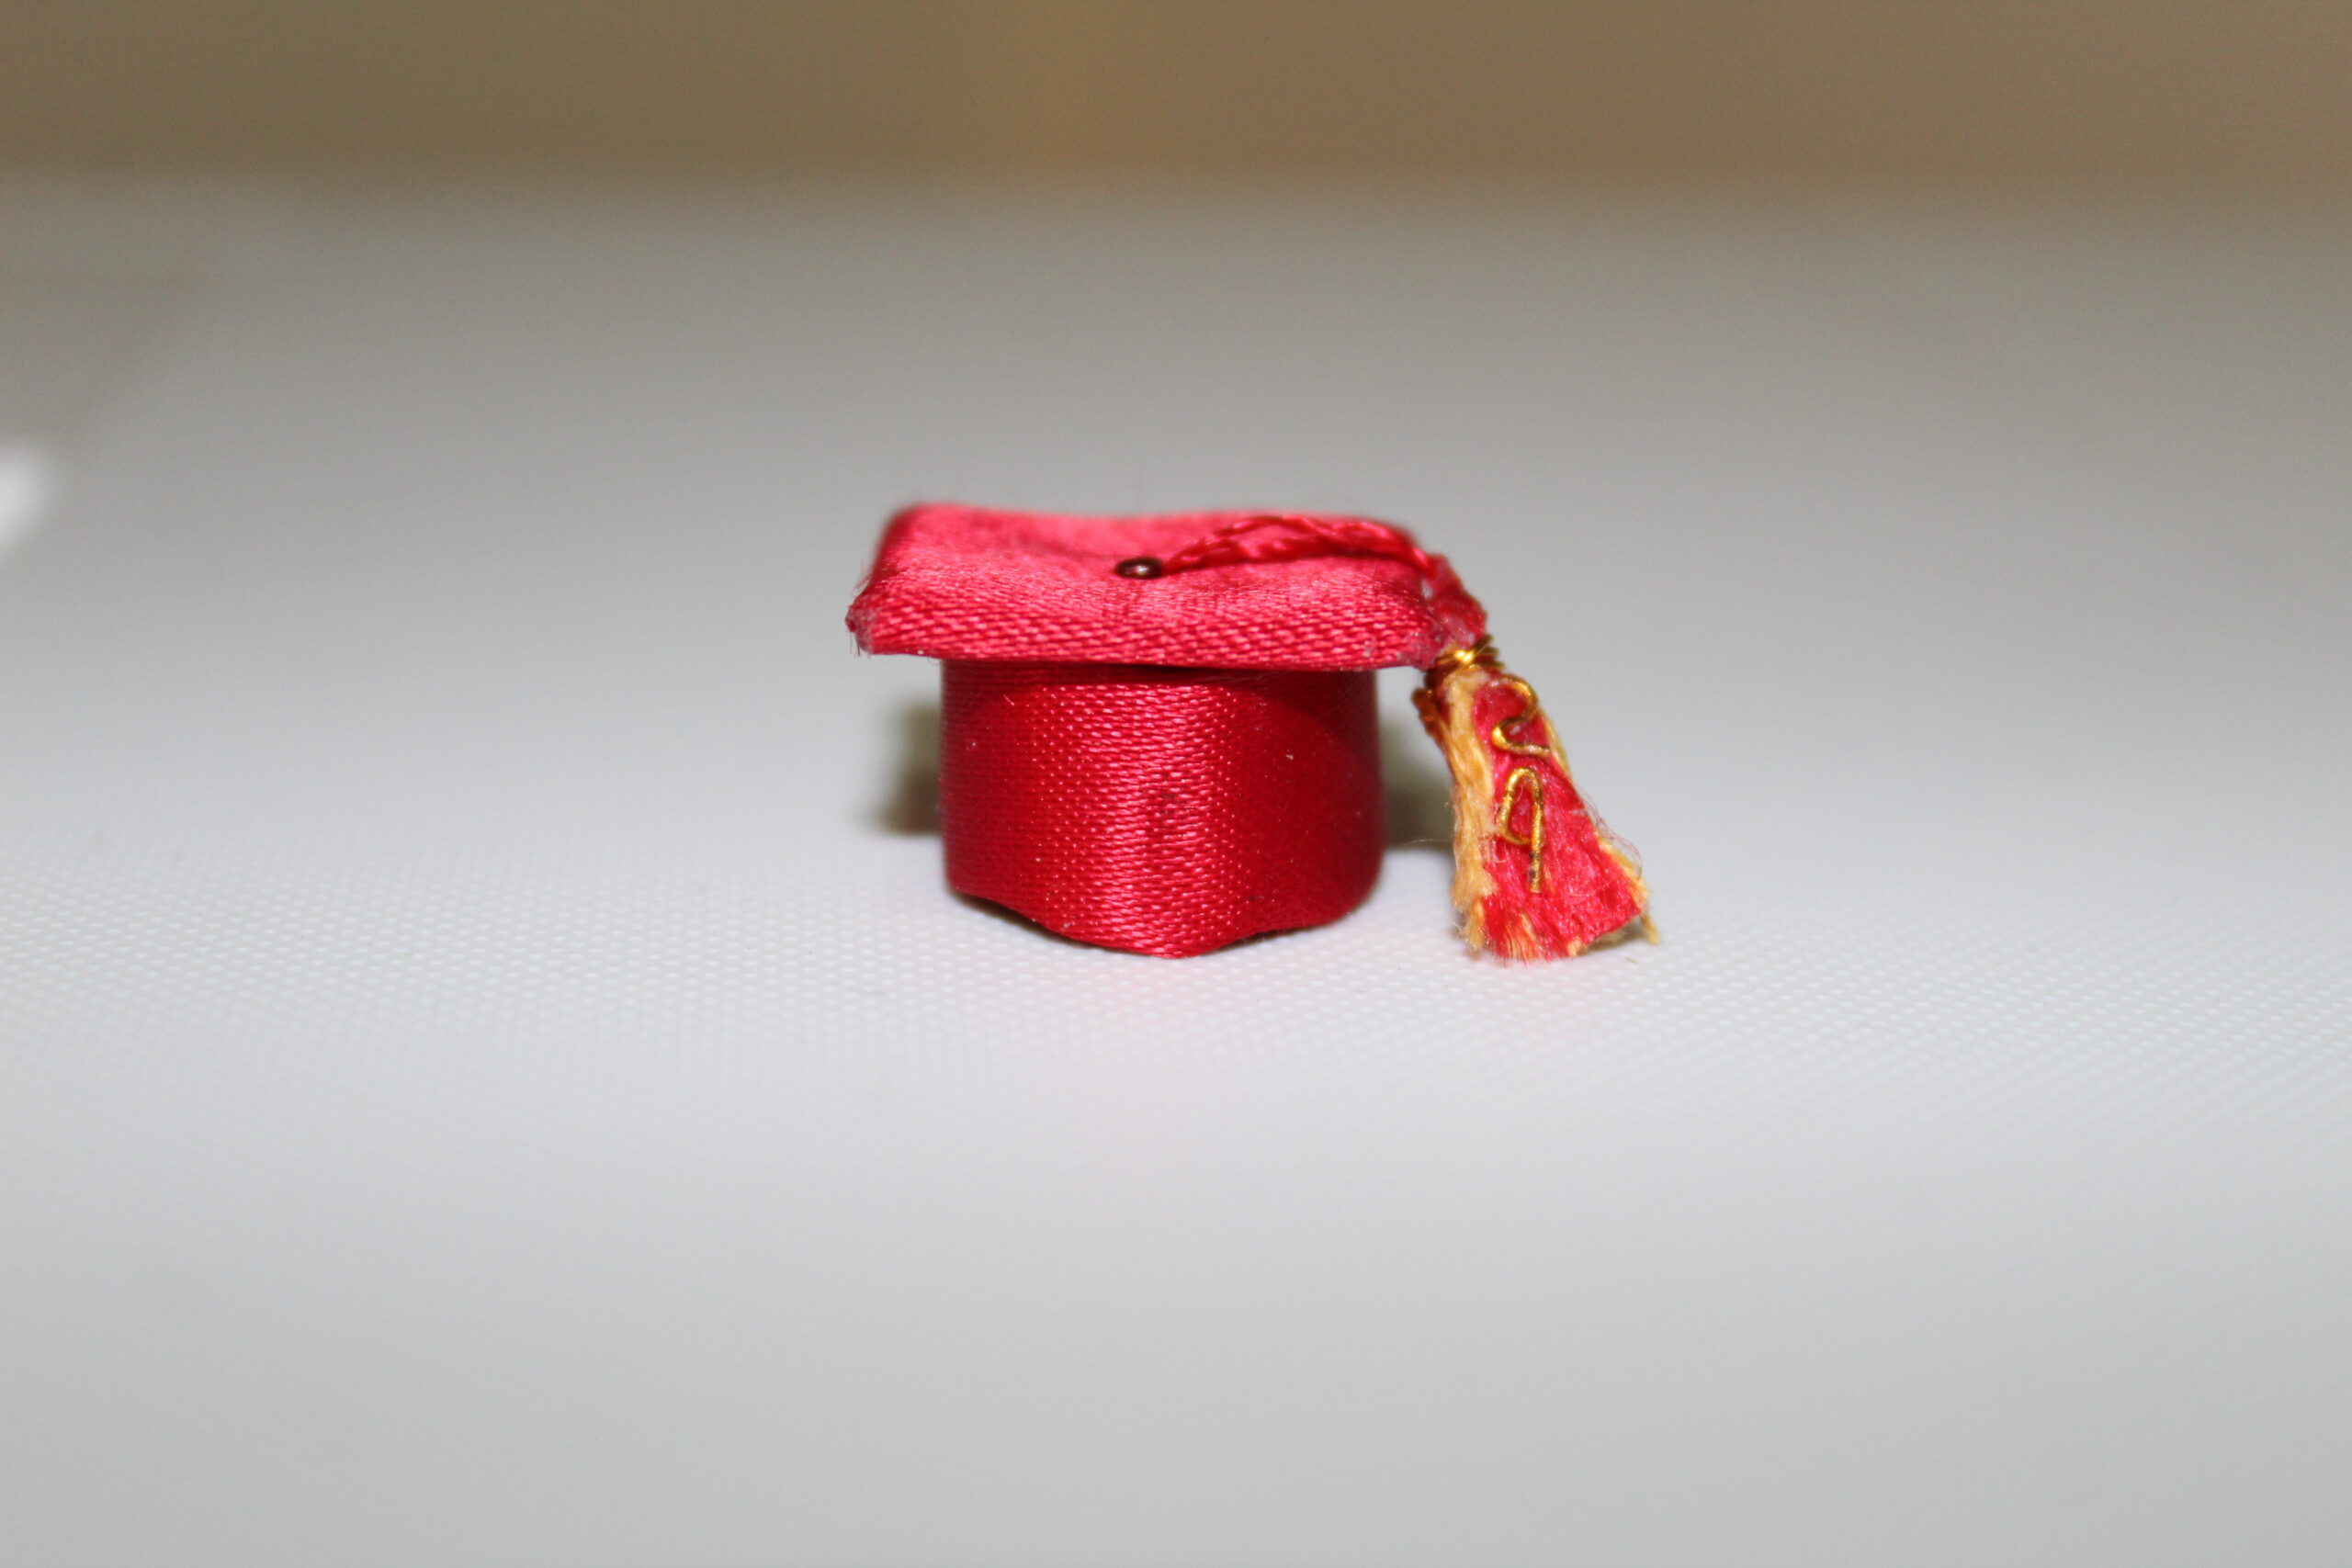
This mini mortarboard is hanging on the fencepost next to Elyse’s path in the “Follow Your Path” post. Its satin finish mimics that of modern graduation attire and would make a thoughtful gift for a graduate or a great addition to a miniature graduation party scene. It’s a bit tricky to preserve the satin finish during construction, but I think the results are worth the effort.
You will need these materials and tools:
- 1 1/2 inch wide satin ribbon about 4 inches long
- Aleene’s STOP FRAYING, or other fabric glue
- embroidery floss, one or two colors
- straight pin
- thin cardboard
- thin wire
- permanent marker in a color similar to the ribbon
- popsicle stick, with edges sanded smooth
- masking tape
- small wire cutters
- ruler
- craft knife, scissors or rotary cutter to cut cardboard
A little more about the materials and scale

This hat is in 1:12 scale, although the tassel is a bit larger than scale. I wanted space for numbers and to match Elyse’s school colors which required two colors of embroidery floss. Using two colors of floss makes a fluffier tassel, so I included instructions to trim it down.
The ribbon I used had a simple edge without decorative edge detail. Ribbon that has a detail on the edge can be harder to cut accurately and bulkier, possibly affecting the quality of the finished cap. Before you start, be sure to iron your ribbon on a cool setting to remove any wrinkles. Wrinkles will be noticeable in the finished hat.
The cardboard was a scrap piece. A piece about as thick as that found in a cereal box works well. Avoid using brightly colored cardboard that is not the same color as your ribbon.
Making the board

Cut the cardboard into a 3/4 inch square. Poke a hole in the center of the cardboard large enough for a straight pin to pass through. You can use your straight pin to make the hole. Using a sharp tool will make the job easier. This will make a board that would be 9 inches wide in real life.
Cut a 1 1/2 inch long section of ribbon to create a square.
Note: If you would like to make a mini of a larger real-life hat with a 12 inch board, cut the cardboard into a 1 inch square. Use 2″ wide ribbon and cut a 2 inch length of ribbon.

Use a permanent marker in the color of your ribbon on the edges of the cardboard. This will prevent seeing the color of the cardboard if you have any gaps in the satin covering.
Color the head of the straight pin as well. The color is likely to rub off the head of the pin a little during construction but it will be easy to touch up later.

Place a tiny drop of glue on the hole in the center of the cardboard. Gently center the square of ribbon over the cardboard. Avoid pressing down on the ribbon so the glue does not bleed through. You will secure the ribbon in the next step. The satin ribbon is a challenging material to work with as it frays easily and glue will soak through. Use a light touch throughout the construction of the cap to maintain the satin appearance of the ribbon. A heavy hand can cause the ribbon will fray away to nothing and the finished project to show glue blotches.

Push the straight pin through satin ribbon, drop of glue and the hole in the cardboard.
You can see that the ribbon has already started to fray. We will prevent that soon.

Carefully cut a square from each corner of the satin ribbon. Cut close to the the corner of the cardboard but not too close!
Put a very small amount of glue along each edge you just cut. The glue will prevent more fraying. During this project, the goal is to keep the glue only on the edges of the ribbon as much as possible.

Allow the glue to dry.
Test the fit of the ribbon by folding it over the edge of the cardboard to see how well it covers. Some trimming will be required to keep the ribbon from being too bulky.

Trim as needed to reduce bulk and improve fit. Fold each flap over to see which two opposite sides most need trimming. Trim those and leave the others full size. Be careful not to trim too close to the corners or the cardboard will show.

Before gluing, try folding the trimmed flaps first then the untrimmed ones folded last. Also try folding the untrimmed sides first to see which gives you the best result. Folding the untrimmed flaps last gives you no seams under the board, but does leave an exposed edge. I folded the untrimmed flaps last.
Put some glue around the center of the board and press the ribbon down. Avoid glue near the edges.
Let it dry. The glue is tacky enough that you will probably not need weight or taping to keep the ribbon in place.

Trim any strings from frayed areas.

Add a small amount of glue on any trimmed edges.

Use your fingers to press the edges down and secure any stray strings. Pay extra attention to the corners.
Be careful not to touch the top surface of the cap with glue on your fingers. You don’t want any glue on the top of the cap because it will show.

If you do get a bit of stray glue on top of the board you can try to gently rub or pull it off with a pair of tweezers.
Making the cap

Cut a 2 inch length of satin ribbon. If you are making the cap with a larger (12 inch in real life) board you will still use a 2 inch length of ribbon.

Fold the 1/4 of the width of the ribbon down at the top. Do the same at the bottom, folding 1/4 of the width up from the bottom. The free edges should meet in the middle.
Iron on a cool iron setting to set the folds.

Fold the ribbon again so the folded edges meet to create a band of ribbon with four layers.
Iron on a cool setting to set the folds.

Use a small amount of glue to glue layers of ribbon together at the end. Do the same at the other end.
Allow the glue to dry.

Place a small amount of glue on each end of the band of ribbon. Bring the ends together and clip the seam. A clothespin works well for this.
Set aside to dry.
Making the tassel

Cut about 5 inches of each color of floss.
Pull one strand of floss away and save it for the cord of your tassel.
Loop both pieces of floss around a popsicle stick. I made two loops around the stick for the fluffy tassel. I sanded the edges of the stick so I could be sure the floss would slide off later without snagging.

Thread a needle with the single strand of floss you set aside earlier.
For ease of handling, secure the stick and both ends of the floss with tape.
Pass the needle between the floss and popsicle stick and pull the single strand of floss through.

Tie the single strand of floss around the bundle of floss and secure it with a knot.

Gently slide the popsicle stick out of the loop of floss.

Open the loop of floss and cut through the bottom of the loop at the location of white line on the photo.

Trim the long strands that are taped down the same length as the other strands. Trim at the location of the white lines .

The tassel should look like this.
Wire will be used to bind the tassel.

Wrap the wire around the tassel a couple of times and twist it tight.

I twisted a longer section of the wire than necessary because I was giving this as a gift and I wanted to be sure it would not loosen if handled. You could cut it off close to the wrap instead if desired.

I bent the wire down and through the tassel to hide the end.

Trim the extra wire.

Fluff the tassel and trim the ends so they are even.
I also trimmed some strands out of the center of the tassel to decrease the fluffiness. Trim in the center until it is a thin as you want.
Assembling the parts

Temporarily remove the straight pin from the board.
Thread the cord of the tassel through the needle and pull the cord through the board.
Trim the cord, leaving a long enough section to glue to the under-side of the board.

Remove the clip from the band of ribbon you made earlier.
Use your fingers to press the layers together and make the band into a ring. Be persistent, working your fingers around the ring a few times until it is smooth.
Cut a circle of ribbon the same size as the ring of ribbon.
Put a small amount of glue on the edge of the ring of ribbon.

Place the circle of ribbon on the ring of ribbon to create the cap.
Put some glue on the underside of the board to secure the tassel cord.
Put glue on the outside of the top of the cap.
Glue the board to the cap.

Touch up the color on the straight pin using the permanent marker if some color has worn off during handling.
Replace the straight pin. Put a small drop of glue inside the cap to secure it and trim the excess with wire cutters.
I made the numbers from the same wire that was used to bind the tassel and glued them on using super glue. The numbers are larger than on a real tassel but I wanted them to be prominent. It was also very tricky to bend that wire!
Did you make one? Any suggestions? Let me know in comments.

